Its less than two weeks left for the presentation. So to plan out my presentation, and the stuff that I am going to put into the presentation, I made something like a plan. This plan will help me to get organised, and finish my work on time.
My Plan
Introduction
VIDEOS PLAYING
At the beginning of the assignment, i did various experiments on my folie. This included fluid experiments and emission of particles and hair experiments using force fields.
So as to begin with the project, to create a form which would be used as a mass for my model, I used force fields to generate different hair particles.
SITE – FROM WHERE THE FORCE FIELDS WERE GENERATED.
1st- Initially the force fields were placed two force fields on the land; towards CBD and New Farm.
one on the bridge connecting the fortitude valley and kangaroo point: high traffic
SITE- MOVED FORCE FIELDS
Then I moved the force fields to one towards the new farm, and one onto the river as seen on the sketches.
VIDEO OF EXPERIMENT 3
This is a video of how I did it, this will show how the form of the hair particles changes, when the force fields are moved around from CBD to new farm to the river.
SKETCHES HOW THE FORM WAS MODIFIED.
so after the form was derived, I modified it by rotating one of the faces to create a cantilevered roof structure.
INITIAL FORM PICTURE ON SITE.
So after the form was created, I moved on to create the spaces inside the building. Basically the whole building will be functioning as a public building. So I wanted to create as much as openings, so that people who passes the building will also come to know about whats happening inside.
So I created solid wireframes on the cantilevered part of the roof, so that when the roof is touching the ground, it creates a transitional space like a pavilion.
TRANSITIONAL SPACE – THE CANTILEVER
PICTURE OF THE TOP VIEW HOW PEOPLE CAN ENTER AND EXIT THE BUILDING EXPLAINING THE TRANSITIONAL SPACE.
I also did a cloth experiment, which shows how the people will pass through this transitional space. The cloth is generated from the direction where most people will be accessing the site.
EXPERIMENT OF THE CLOTH.
PICTURE OF THE PEOPLE WALKING AROUND THE CANTILEVERED ROOF
FLY THROUGH
Another reason was that, the whole structure is going to be made out of concrete. So its structure will be very heavy, and the cantilevered roof may not work out structurally. Now that its a frame, its more light weight and will be structurally more stable.
I also created wireframes on other parts of the buildings, including the side walls. Apart from being open to the surrounding, it also creates shadow and light patterns on the ground, once again linking the context with the building.
PICTURE OF THE WALL FRAME WITH LIGHT AND SHADOW.
FLY THROUGH
TSUNAMI EXPERIMENT.
I tried on experiments to work out how the building will respond to a wave, this is a tsunami wave experiment. This kind of gives the basic impression on what happens to the building, when a wave of two different intensities hit the building.
The public spaces that are incorporated into this building are, commercial spaces, community spaces and an outdoor space.
The commercial space will be a coffee shop, which will be partially open.
SHOW FLOOR PLANS AND EXPLAIN.
SHOW INTERIOR RENDER OF THE DOWNSTAIRS SHOPPING COMPLEX WITH CANTILEVE R ROOF.
THE SECOND FLOOR is an office space and a exibition space.
SHOW INTERIOR RENDERS – COMMERCIAL
COMMUNITY
OUTDOOR
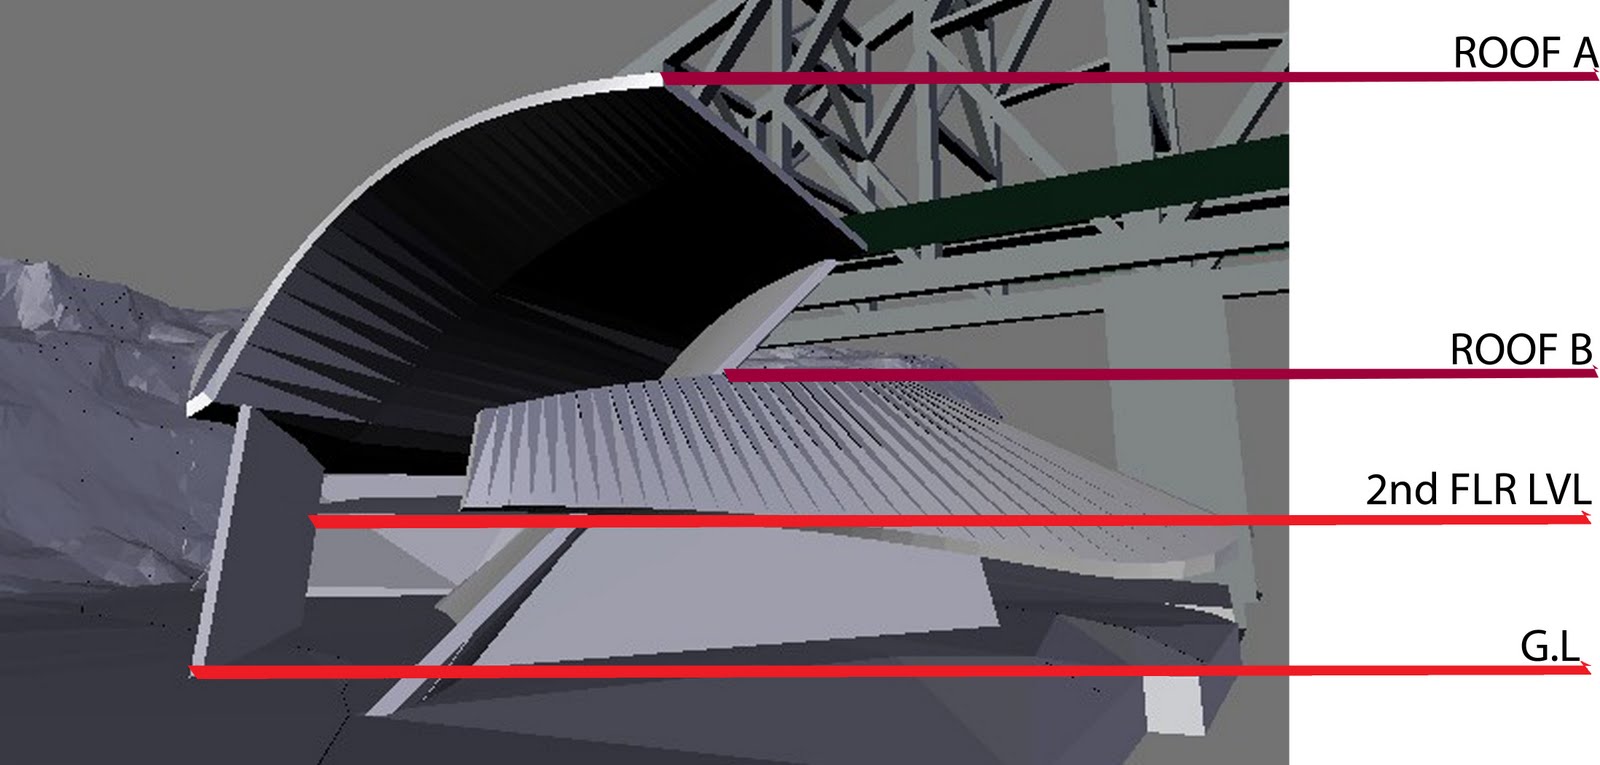
SHOW SECTION.
As for the outdoor area, I am creating a roof garden, with grass on it where people can walk upto. I created grass on the roof, also using the hair particle system.
This screen cast will show how I did it.
And these are the end results.
SHOW PICTURES OF THE OUTDOOR AREA.
FLY THROUGH THE OUTDOOR SPACE.
SHOW THE LAST RENDER. AND CONCLUSION
This is just a summary of how my presentation will be layed out.
Anyhow going back to the actual work that needs to be done; I worked on floor plans today.
 |
GROUND FLOOR PLAN
EXIBITION AND CAFE
COMMUNITY/COMMERCIAL SPACES |
 |
FIRST FLOOR PLAN
EXIBITION AND OFFICE SPACE
COMMUNITY/COMMERCIAL |
 |
ROOF PLAN
ROOF GARDEN WHERE PEOPLE CAN WALK UPTO
OUTDOOR AREA. |


