During the last tutorial we learned how to upload our folie into Blender. What I did was I exported my Sketchup file as a 3Ds file and imported it to Blender right away. After importing the file we learned about how to create
fluid tests and animation. As an assignment, we have to create 50 animations of fluid experiments on our folie.
So I better get started.
Experiment 1
In the first experiment, I am using a regular box as the fluid. And I changed the viscosity to water.
Experiment 2
In this one I am still using the box as the fluid but I changed the viscosity to honey.
The honey is very thick so the result itc creates is different from water.
Experiment 3
For this one, I am still using the box but I changed the viscosity to oil.
Experiment 4
Since Ive done experimenting on different viscosities with the same fluid, this time I am going to change the
fluid to a UV sphere. As for the viscosity I am using water.
Experiment 5
Just to see if it creates any difference, This time I am going to change the viscosity to honey and use the same fluid (UV sphere)
Experiment 6
For this experiment, I changed the fluid to a long cylinder, and I am going to use water.
Experiment 7
In experiment 7, I rotated my folie in the Y axis. And also i made the domain a bit smaller that the domains
I have used in the previous experiments.
xperiment 8
For this experiment I rotated my folie again to see if it creates any difference.
Experiment 9
For this experiment I rotated my folie back to its original side. I changed the fluid to a cone and changed the domain to a UV sphere.
Experiment 10
For this experiment I rotated the fluid (cone) upside down.
Experiment 11
For the experiment 11, I used a cube as the fluid, but then I rotated my folie.
Experiment 12
For this one, I just maintained the cube, But I rotated my folie again.
Experiment 13
In experiment 13, I rotated my folie again, but further more so that its vertical now. I maintained the box.
Experiment 14
In experiment 14, I changed the fluid to a cylinder and scaled it thinner along the Y axis. But I maintained the rotated folie as it is.
Experiment 15
For this experiment, I still maintained the rotated folie, but I changed my fluid to a UV sphere. In the previous 3 experiments I just wanted to see the difference when I change the shape of the fluid.
Friday, April 8

Sunday, April 3
Fluid Architecture : Blender Tutorial 3
The next tutorial is about creating a simple hat for the person.
First I drew out the outline of the hat.
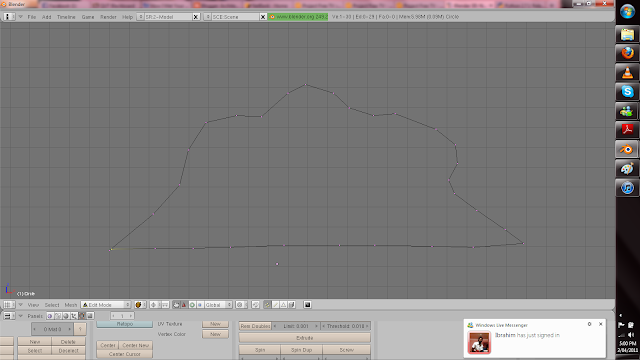
By usin the spin controls under the mesh tool setting the hat looks like this now.


This is the completed version of the hat.
The next step is to put the hat on the person.

Now the hat has been put on the person.
End of this Tutorial.
:)
Cheers
First I drew out the outline of the hat.
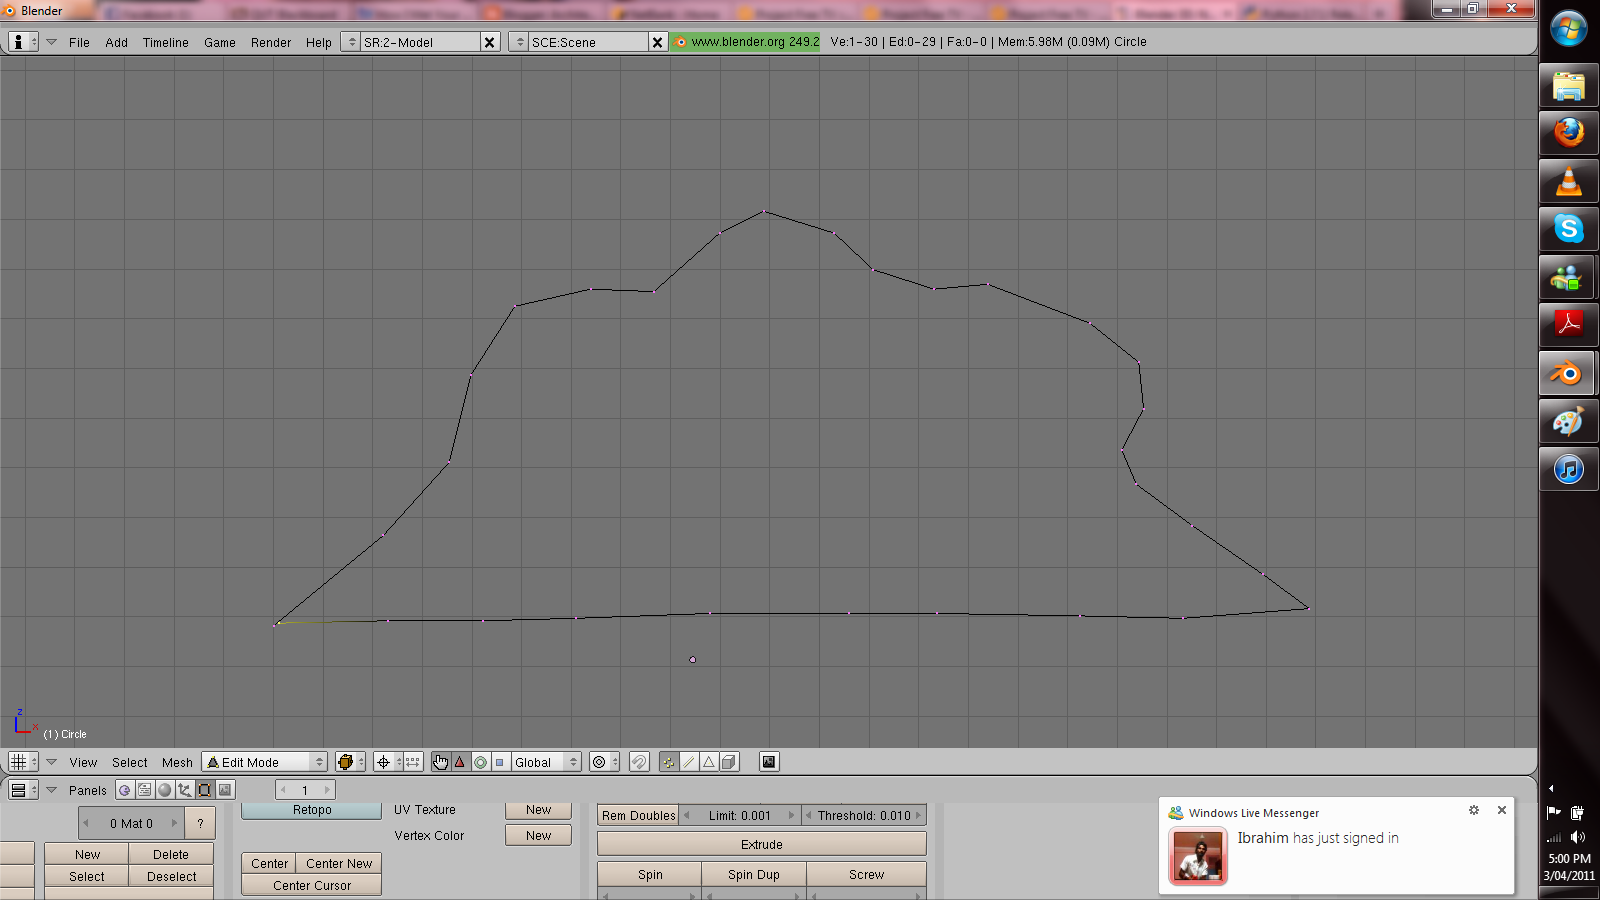
By usin the spin controls under the mesh tool setting the hat looks like this now.


This is the completed version of the hat.
The next step is to put the hat on the person.

Now the hat has been put on the person.
End of this Tutorial.
:)
Cheers
Saturday, April 2
Fluid Architecture : Blender Tutorial 2
In this tutorial I am going to learn how to add details to the person I have created.
So first I just created the person, as shown in the previous tutorial. Now I am going to work on the details of this person.

As for the next step, to obtain the basic shape of a person, I adjusted the torso and the hips of the person.


I made the feet, edited the shape of the body and reshaped the head. I also made all the faces smooth and made him lift his arms up.
This is the end of the second tutorial, Adding details to the person.
So first I just created the person, as shown in the previous tutorial. Now I am going to work on the details of this person.

As for the next step, to obtain the basic shape of a person, I adjusted the torso and the hips of the person.


I made the feet, edited the shape of the body and reshaped the head. I also made all the faces smooth and made him lift his arms up.
This is the end of the second tutorial, Adding details to the person.
Fluid Architecture : Blender Tutorial 1
Last Thursdays class was an introduction to theme, Fluid Architecture.
Fluid Architecture: An exploration of the application of animation software fluid dynamics to the design of flood and wave responsive & resistant structures.
Theme Leader: Florian Heise
During the first lesson on Thursday, 31st March, we were briefly introduced to the basics of using blender. We were directed to follow a workshop by Heise and practice blender.
The first step is to ofcoase install the software, using the link http://www.blender.org/.
In the last class, we actually practiced a bit on the basics, so today I am going to practice a bit more, to get a good hold of this software.
So as to begin with the learning process, I am going to refer to the workshop and redo the tutorials that was done in class.
So the first tutorial is about creating a person.
http://en.wikibooks.org/wiki/Blender_3D:_Noob_to_Pro/Modeling_a_Simple_Person
By using the extrude tool, I managed to design the right leg of the person by extruding the boxes.

Now I am going to work on the rest of his body by using the same extrude tool.


After making the body, I added a monkey head on top of the person.

After the whole body is completed, now I am going to smooth the surfaces of the body.

Well this is my monkey man! It looks a bit distorted, but I guess it would be okay for the first time. More blender tryouts coming up!
:)
Cheers
Fluid Architecture: An exploration of the application of animation software fluid dynamics to the design of flood and wave responsive & resistant structures.
Theme Leader: Florian Heise
During the first lesson on Thursday, 31st March, we were briefly introduced to the basics of using blender. We were directed to follow a workshop by Heise and practice blender.
The first step is to ofcoase install the software, using the link http://www.blender.org/.
In the last class, we actually practiced a bit on the basics, so today I am going to practice a bit more, to get a good hold of this software.
So as to begin with the learning process, I am going to refer to the workshop and redo the tutorials that was done in class.
So the first tutorial is about creating a person.
http://en.wikibooks.org/wiki/Blender_3D:_Noob_to_Pro/Modeling_a_Simple_Person
By using the extrude tool, I managed to design the right leg of the person by extruding the boxes.

Now I am going to work on the rest of his body by using the same extrude tool.


After making the body, I added a monkey head on top of the person.

After the whole body is completed, now I am going to smooth the surfaces of the body.
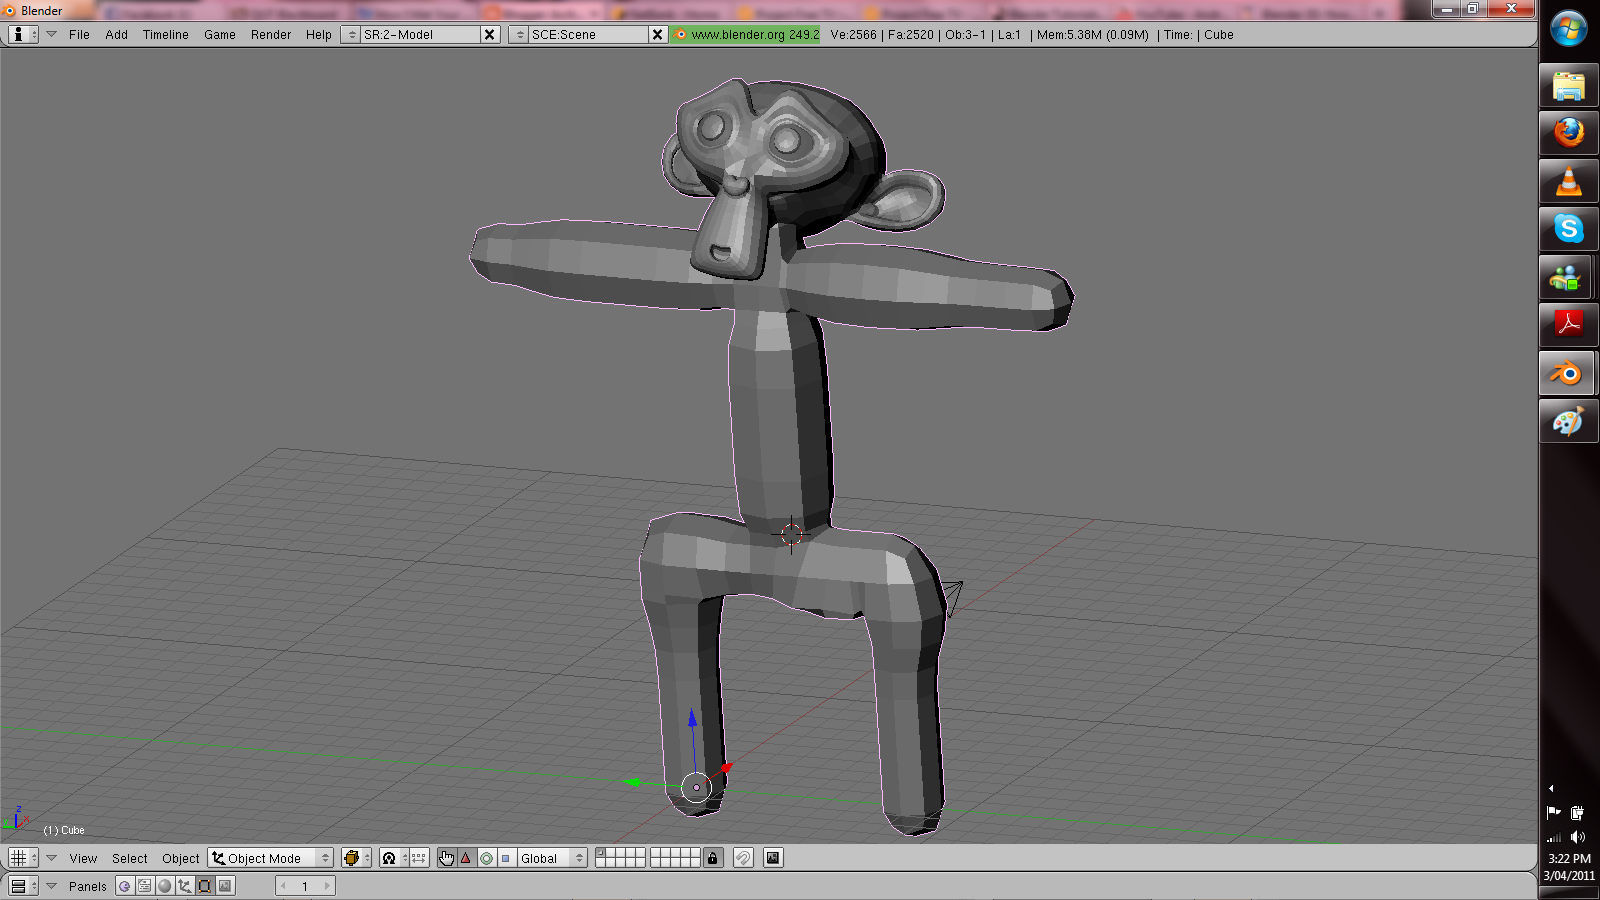
Well this is my monkey man! It looks a bit distorted, but I guess it would be okay for the first time. More blender tryouts coming up!
:)
Cheers
Wednesday, March 30
Project 1: Context and Experiences - Folie Design
Hi, my name is Ihudha. I'm currently studying Bachelor of Design in Architecture at the Queensland University of Technology. This blog is created for one of the units I am doing, DAB510 Architecture Studio 5.
My first entry will be about the first project that I did, the design of a folie. A folie is like an art installation which is put on a site as a space activator. It can be anything. It can be abstract/fluid/solid or anything that we wanted. The criteria is that the folie that we design has to be in a box by 5mx5mx5m, and that it should have a specific function and can be used by at least 1 person.
Site
The site that was given for this project is the Howard Smith Wharves.
Here are some pictures I took.
These are just some pictures I took. After the site visit, I started thinking about a function that would be suitable for the site. Where the environment, especially the view of the river and the calm surrounding can be utilised in a unique way. I had an idea of creating a meditating space or to design the folie for meditation. Its just perfect for a surrounding like these as it disconnects the person from the busy life of the city. And the Howard Smith Wharves is nothing like the busy city.
Design Process
So hence, I started a bit of research on meditation. The first thing that I got interested in was the position of person while meditating. Its something like, that you site crosslegged and you pull your feet in such a way that it rests on your thighs.
Here a picture of the meditation position. This position is also called as the Lotus Position.
http://www.davidmoreton.com/echoes/meditation.html
My first entry will be about the first project that I did, the design of a folie. A folie is like an art installation which is put on a site as a space activator. It can be anything. It can be abstract/fluid/solid or anything that we wanted. The criteria is that the folie that we design has to be in a box by 5mx5mx5m, and that it should have a specific function and can be used by at least 1 person.
Site
The site that was given for this project is the Howard Smith Wharves.
 |
| Aerial view of the site and the boundary On the second week we had a workshop, where they took us to the location. I took pictures of the story bridge but we were not allowed to go into the site. We got to know and see the site from a distance, but it was hard to experience the site at the site itself. |
Here are some pictures I took.
 |
| Looking at the story bridge |
 |
| Near the fencing around the site. |
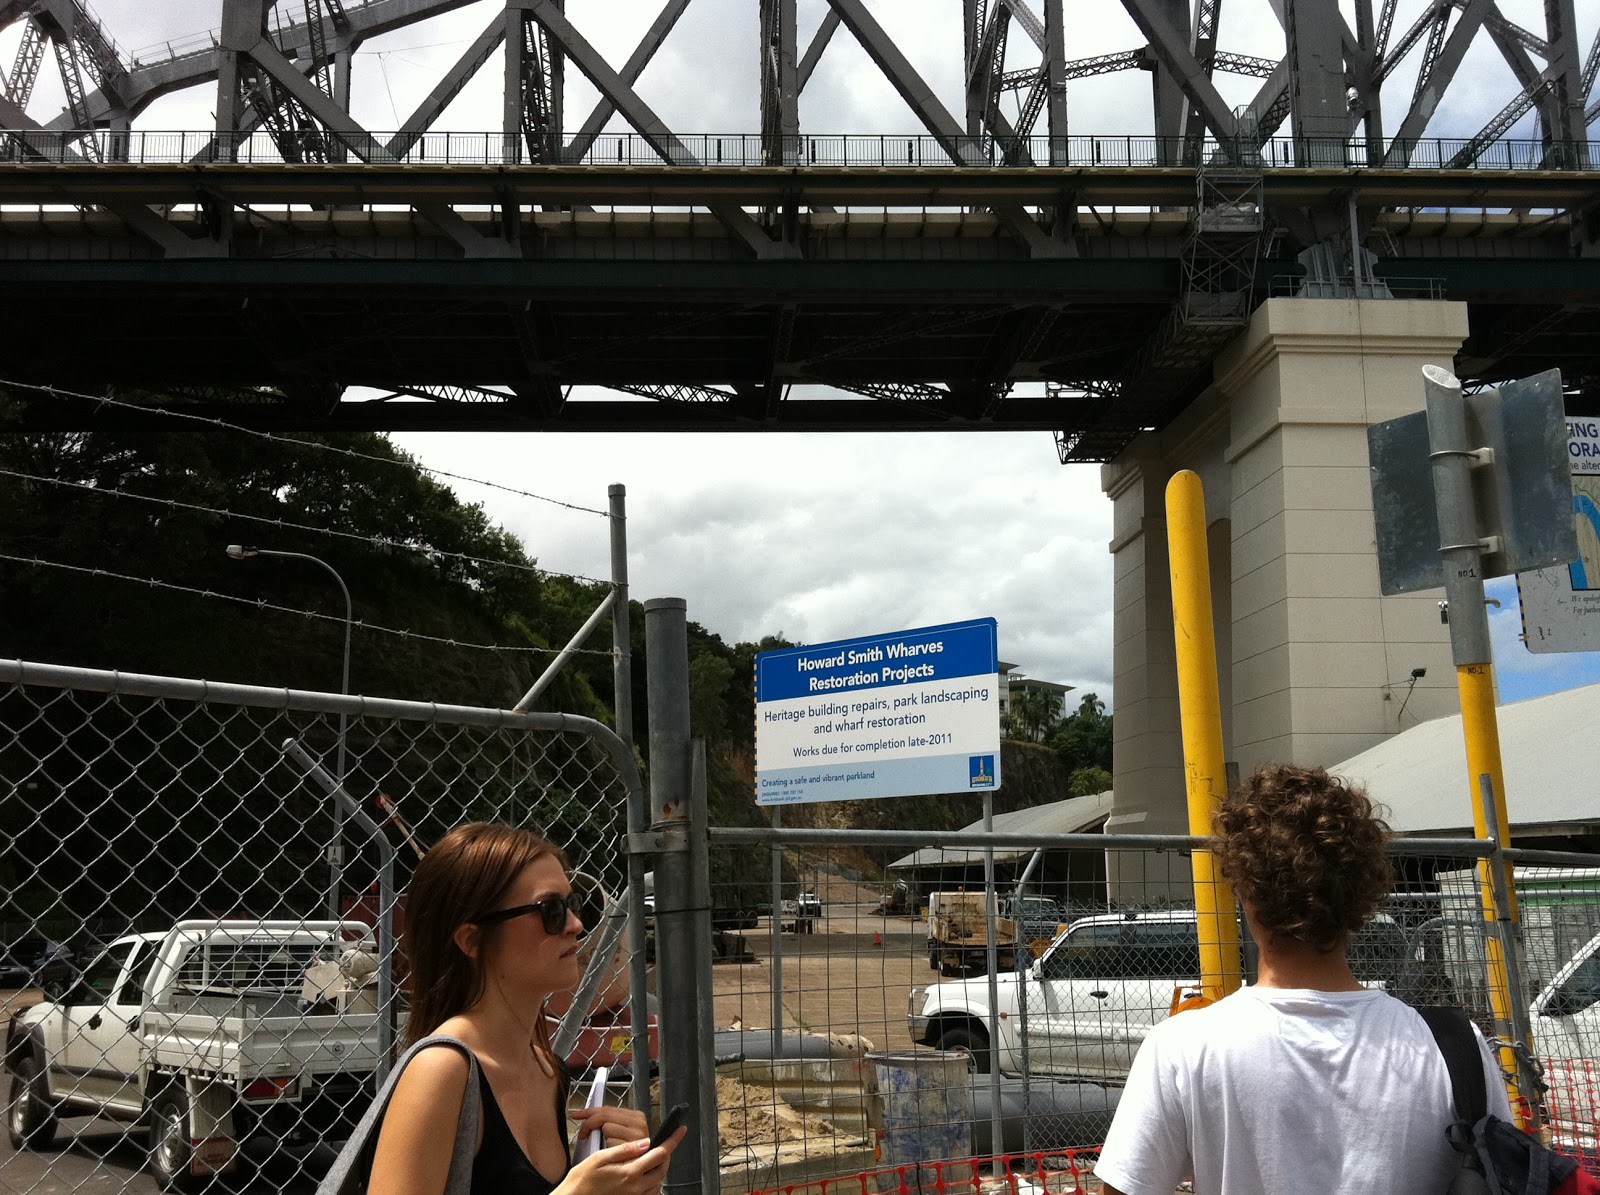 |
| Just at the boundary. The actual site is beyond the bridge. |
These are just some pictures I took. After the site visit, I started thinking about a function that would be suitable for the site. Where the environment, especially the view of the river and the calm surrounding can be utilised in a unique way. I had an idea of creating a meditating space or to design the folie for meditation. Its just perfect for a surrounding like these as it disconnects the person from the busy life of the city. And the Howard Smith Wharves is nothing like the busy city.
Design Process
So hence, I started a bit of research on meditation. The first thing that I got interested in was the position of person while meditating. Its something like, that you site crosslegged and you pull your feet in such a way that it rests on your thighs.
Here a picture of the meditation position. This position is also called as the Lotus Position.
 |
| Taken from |
I wanted the meditating space of the folie to be designed in such a way that it follows the contour of the person. Like, the shape which broadens at the bottom and comes in to enclose at the top. I did some 3d work in Sketchup as well as some sketches.
 |
 |
| Study of the contour of the person and to create a form suitable for it. |
The form that I came up with was a curved formed; a two layered curved form. This form curves on both sides of the person while he/she is sitting inside it. It kind of creates a secure semi private space for him/her to mediate.
Here are some 3d renderings I did in Sketchup. These are just conceptual.
 |
| Different Views of the conceptual 3d Model. |
This was my initial idea for the design. However after the tutorial which was on the 3rd week, I thought about the reviews I got and decided that my design need to be developed further.
So I came up with sketches on how I can expand the design more, without changing the initial concept of the design. I maintained the curved structure but played around with it.
Here are some sketches I did.


I was not able to get a clear idea of what I wanted to get out of this by sketching. So I turned to 3d, where I can easily play around with it and at the same time see how it changes and makes a difference in different angles and views.
Here is what I came up with at last. For these Renderings I used 3ds max. I played with the light to see how it created shadows and overlays and layers as the structure is transparent.

So after the design was confirmed, it was the time for some technical drawings. I worked on the front elevation, back elevation and an isometric view of the folie. The drawings are to 1:25 scale.
After the 3d images and the Auto CAD drawings were ready, I began working on the presentation board or the A1 Poster for the exhibition.
This is the final A1 Poster.

That was the end of the first project Design of the Folie. It was a fun project, as the criteria was quite broad and we could design anything. I just wished that I got a little bit more time to work on the 3d renderings and to make the poster more nicer. But overall I enjoyed the project. It was definitely a good start.
:)
Cheers
So I came up with sketches on how I can expand the design more, without changing the initial concept of the design. I maintained the curved structure but played around with it.
Here are some sketches I did.


I was not able to get a clear idea of what I wanted to get out of this by sketching. So I turned to 3d, where I can easily play around with it and at the same time see how it changes and makes a difference in different angles and views.
Here is what I came up with at last. For these Renderings I used 3ds max. I played with the light to see how it created shadows and overlays and layers as the structure is transparent.

So after the design was confirmed, it was the time for some technical drawings. I worked on the front elevation, back elevation and an isometric view of the folie. The drawings are to 1:25 scale.
 |
| Left: Front View Centre: Isometric View of the Side Right: Back View |
This is the final A1 Poster.

That was the end of the first project Design of the Folie. It was a fun project, as the criteria was quite broad and we could design anything. I just wished that I got a little bit more time to work on the 3d renderings and to make the poster more nicer. But overall I enjoyed the project. It was definitely a good start.
:)
Cheers
Subscribe to:
Posts (Atom)